As Quicken is serving from the last 30 years and still remain #1 personal accounting software, users may interface with software glitches like unable to update their online accounts, unable to print etc. So, in the same way, we’ll discuss Quicken Error OL-393-A.
When updating online accounts you may also face the following errors:
Note: You may also face QuickBooks Error OL-393
Why, When and How Quicken Error OL-393-A Occurs?
Reasons for Quicken error code OL-393-A
- Quicken isn’t running with the latest release/Update
- Quicken having incorrect account information
- Verify Quicken online services
- Verify Quicken data files etc.
5 Simple Steps to resolve Quicken Error Code OL-393
A. Verify Quicken if it’s running with the latest release
- Open Quicken
- Go to Help > Check for updates
- If the update is an available click Yes to install it or if already updated move further with the steps

B. Refresh online account information
- Open the account from the left-hand side account tab that causes this error
- Go to the top right gear icon and click on Update now (Ctrl+Alt+U)
- Type your account password and click Update Now
- If it has been updated successfully do the same with other accounts that have this issue.

C. Verify Account information and check for hidden accounts
- Go to Tools > Account List (Ctrl+A)
- Click on Edit for the account that has this error
- On General Tab double check your bank information like account number, routing number etc.
Check for Hidden Account
- Go to Tools > Account List (Ctrl+A)
- Check show hidden account at the bottom of account list if any account is hidden and click Edit > Display Options and uncheck Hide this account in Options
- Verify the information from the account if everything is correct you can hide this account again.
Notice: Now Quicken is providing 5GB Free Online Storage with Dropbox
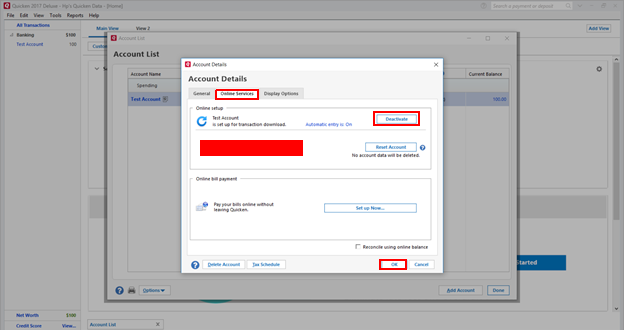
D. Deactivate Account and validate Quicken File
- Go to Tools > Account List (Ctrl+A)
- Click on Edit for the account that has Quicken Error OL-393-A
- Select Online Services tab and click Deactivate
- Click Yes to confirm
- Then click OK and Done
For Validating Quicken File
- Go to File > File Operations > Validate and Repair…
- Check on Validate File and click OK
- The validation process will begin (it may take some time depending on your file size)
- You’ll get a report for data files via DATA_LOG
Information: If you found any error under DATA_LOG immediately contact Quicken Support
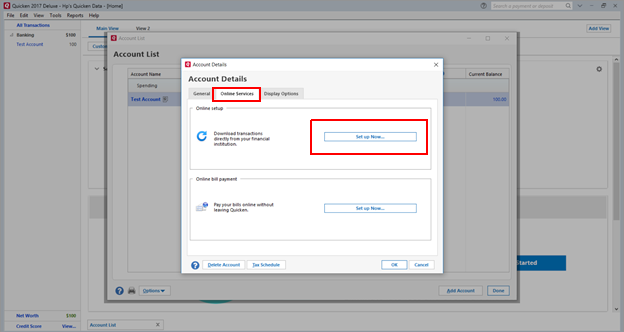
E. Reactivate your bank account
- Go to Tools > Account List (Ctrl+A)
- Click Edit for the account that has the problem
- Select the Online Services tab and click Set up Now…
- Now type your bank Username and Password
- Check on Save this password (It may ask you for your Vault password or Quicken ID)
Quick Note: After sepration of Quicken from Intuit Inc. it’s necessary to create Quicken ID to every user.
- Click Connect
- In the process of reactivating your bank account, Quicken will pull up your bank information no need to add click on LINK (see the picture below)
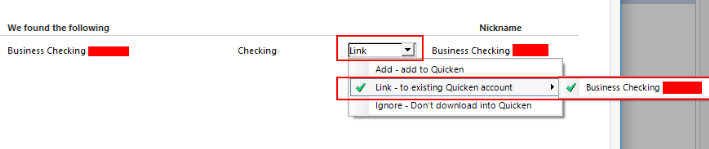
- Click Next and Finish
After following all the above steps Quicken Error OL-393-A will be removed if it still persists into your account contact Quicken Technical Support or leaves your questions/queries below into the comment section we’ll respond asap.