
Quicken is flexible financial software that allows you to track all of your financial information under one roof. It’s helping us to download information from PayPal to Quicken from the last several years.
So Today, In this article we’ll discuss how to download transactions from PayPal account to Quicken software. It’s very simple to download or Import/Export information from PayPal account to Quicken. We can download or Import/Export the information via two methods
Express Web Connect – It helps you to automatic updates your accounts by connecting them with your financial institution
Quicken Interchange Format (QIF) – This method helps you to Export information from your PayPal account and import them in Quicken.
IMPORTANT: If you’re not sure about the process you may contact our Quicken Support team.
How to Add PayPal Account into Quicken by using Express Web Connect
1.Open Quicken
2. Go to Tools > Add Account…
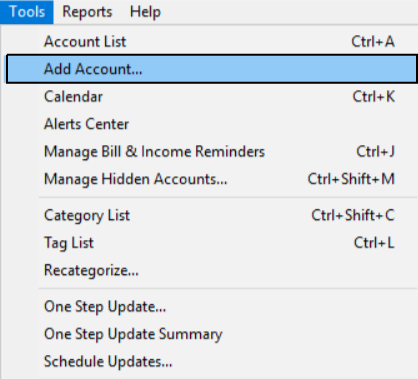
3. Choose Checking or Savings (We recommend you to choose Checking)
4. Now Search for PayPal and click on the very first result (PayPal)
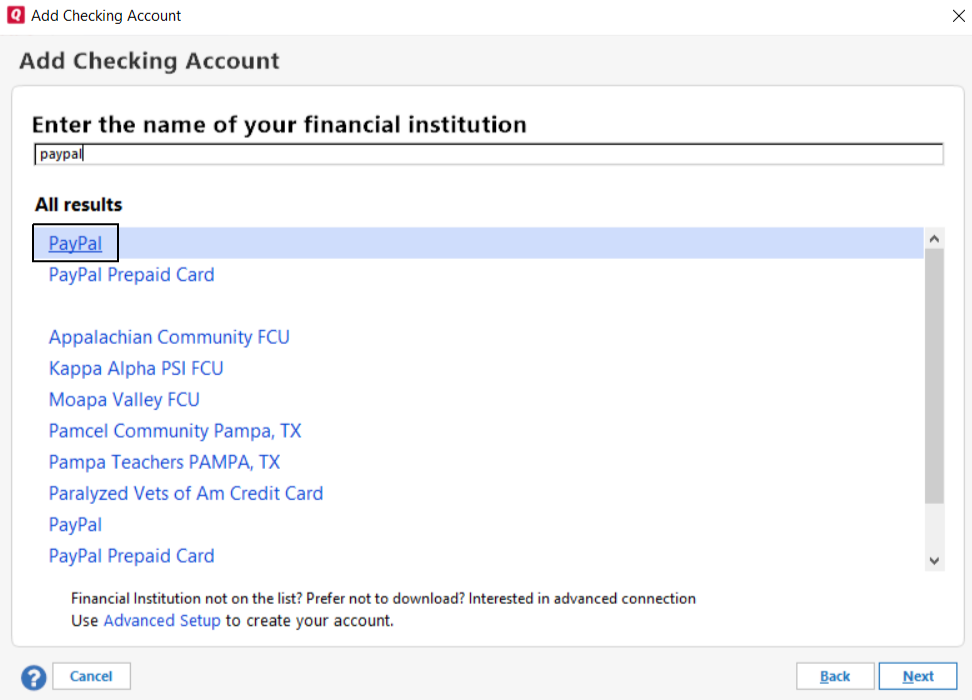
5. Then click on Next
6. On the next screen, you need to enter your PayPal username and password and then click on Connect
7. Now Follow the onscreen instruction to add a PayPal account
Import/Export financial data from PayPal to Quicken by using QIF
Export transactions from PayPal account
You need to download the information from PayPal account to import it into Quicken via QIF. To do that
1. Go to www.paypal.com and login to your account
2. Once you logged into your account click on Reports section
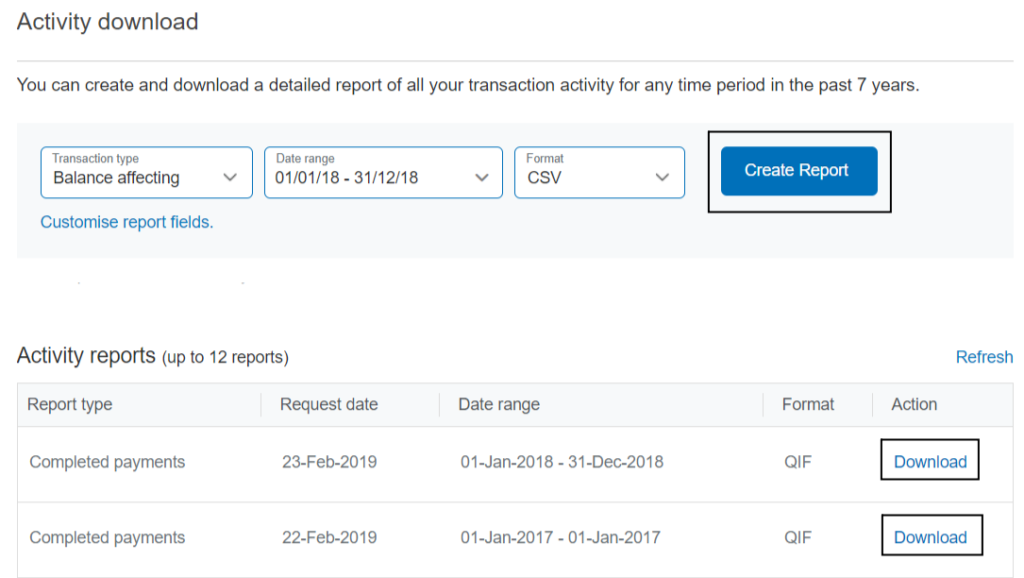
3. Under the reports section, you need to click on Activity download
4. Click on Format tab and choose Quicken
5. Choose the date range to export the information
6. Then click on Create Report
To download the QIF file you’ll be going to have two options:
1. You’ll receive an email to download a QIF file
2. You can remain on the same page and click on Refresh to get the latest file and click on Download (see an image below)
Notification: You can download the last seven years of information from PayPal to Quicken via QIF format.
Import transactions into Quicken from PayPal
As you already downloaded the QIF file that contains all of your previous information. To import them
1.Open Quicken
2. Go to Tools > Add Account…
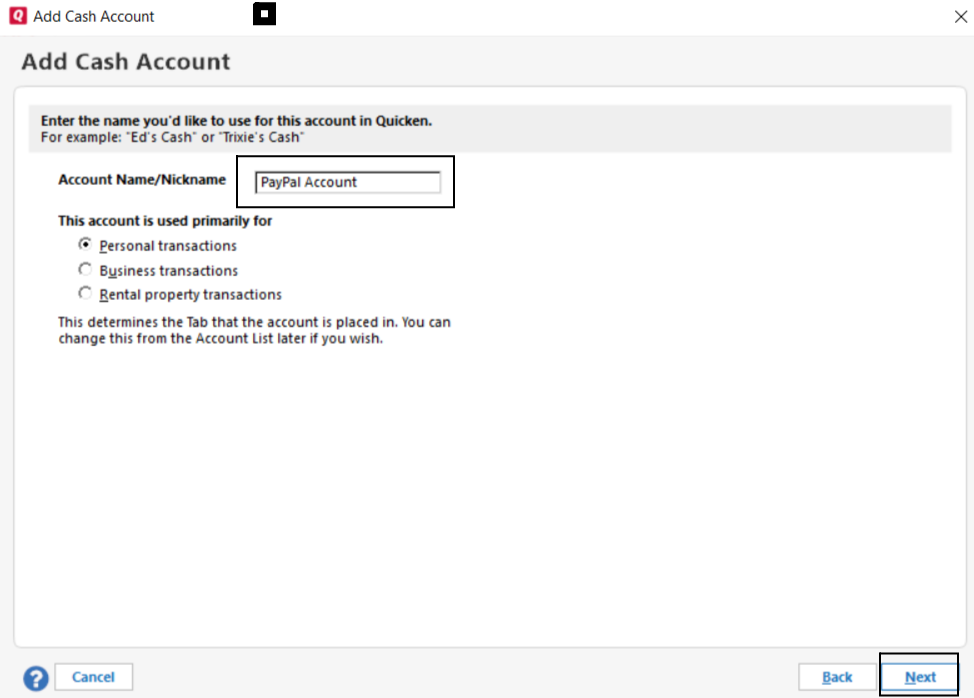
3. Choose Cash
4. On the next screen give a nickname to your cash account and click on Next (See an image below)
5. Follow the on-screen instruction
Once you’ve created a Cash account proceed further with the below steps to import your transactions into Quicken
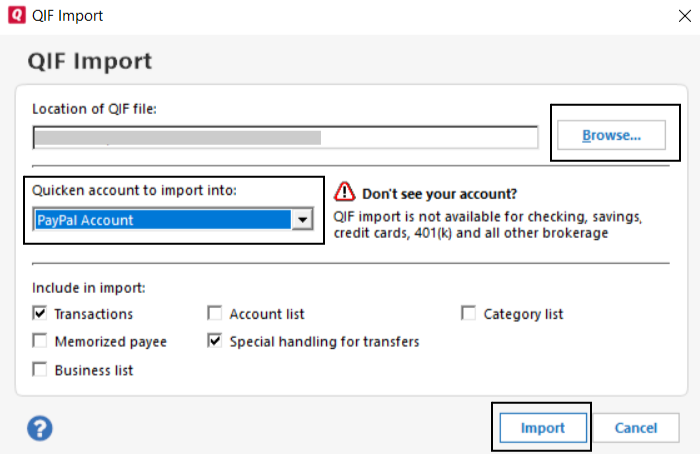
1. Go to File > File Import > QIF File…
2. On the next screen click on Browse to upload the QIF file from your system
3. Choose the same cash account that you created
4. Choose any option from Include in import and then Click on Import (see an image below)
Now your transactions have been imported into Quicken and if you want you can delete the QIF file from your computer.
IMPORTANT: QIF format is available only for cash accounts.


This article made my time worthy. Thank you.